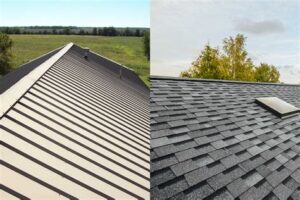
Are you looking to elevate your home’s roofing system while ensuring maximum protection and durability? Transforming your metal roof with drip edge is an essential update that can significantly enhance your home’s functionality and aesthetic appeal. In this article, we’ll delve into the importance of drip edge and how it can prevent water damage, extend the lifespan of your roofing materials, and improve overall performance. We’ll also provide a comprehensive step-by-step guide for installation, highlight common mistakes to avoid, and share expert tips for maintaining your new roof. Whether you’re a DIY enthusiast or a homeowner looking for professional advice, our guide offers valuable insights that will help you achieve a top-quality roofing transformation. Get ready to discover how drip edge can be a game-changer for your home!
Understanding How Drip Edge Can Transform Your Metal Roofing
Drip edge is an essential component in the roofing system, particularly for metal roofs. Its main function is to direct water away from the underlying structures and to create a neat, finished edge. By integrating a drip edge, you can significantly enhance both the functionality and aesthetics of your roofing system, leading to a transformation that ensures long-term durability and style.
One of the primary ways transform your roofing is by preventing water from seeping under the shingles or metal panels. This crucial aspect helps avert issues like wood rot, mold growth, and structural damage, ensuring that your investment is well protected. By effectively guiding rainwater away from the building, a well-installed drip edge acts as a defense mechanism, helping to increase the lifespan of your roof.
In addition to its protective qualities, drip edge contributes to the overall look of your roof. Available in a range of colors and materials, it allows for customization that can complement the architecture of your home. This enhancement not only improves curb appeal but also raises the overall value of your property, making your home more attractive to potential buyers.
Moreover, drip edge installation can help improve drainage, minimizing the risk of water pooling or ice dam formation during colder months. This aspect is pivotal for regions that experience heavy snowfall or rainfall, as it can significantly mitigate the risk of water damage.
Incorporating a drip edge into your metal roofing can dramatically transform your home. Not only does it provide essential protection against moisture intrusion and damage, but it also enhances the visual appeal and value of your property. Investing in this vital roofing component is a smart decision for any homeowner looking to improve their roofing system.
Step-by-Step Guide to Installing Drip Edge for Maximum Protection
Installing a drip edge is an essential step when looking to transform your home with metal roofing. It helps effectively direct water away from your roof and prevents moisture-related issues. Here’s a detailed step-by-step guide to ensure maximum protection during your installation:
- Gather Your Tools and Materials: Before starting, ensure you have all necessary tools and materials, including the drip edge material, roofing nails, a measurement tape, a chalk line, and a hammer.
- Measure Your Roof: Carefully measure the edges of your roof where the drip edge will be installed. Take note of the lengths required for each section to avoid wastage.
- Cut the Drip Edge: Using your measurements, cut the drip edge to fit the lengths you need. Ensure the cuts are clean to facilitate proper installation.
- Position the Drip Edge: Place the drip edge along the eaves, ensuring it extends slightly over the end of the roof edge. This configuration allows for optimal water runoff.
- Secure the Drip Edge: Using roofing nails, secure the drip edge in place. Ensure the nails are spaced evenly, approximately every 12 to 24 inches, for a secure fit.
- Install Underlayment: If applicable, place the underlayment above the drip edge to further enhance waterproofing. This should cover the drip edge and extend up the roof.
- Finish with Metal Roofing: Once the drip edge is properly secured and overlapped with the underlayment, proceed with the installation of your metal roofing panels. Ensure they overlap the drip edge for comprehensive protection.
By following these steps, you’ll not only install a drip edge but also increase the lifespan of your metal roofing and safeguard your home. Proper installation can significantly transform your roof’s functionality, ensuring it withstands the elements effectively.
Key Benefits of Using Drip Edge in Metal Roofing Transformations
Installing a drip edge is a crucial aspect of enhancing the performance and durability of metal roofs. It provides several key benefits that can significantly transform your roofing experience. Below are some of the most important advantages:
- Enhanced Water Protection: Drip edges direct water away from the roof and into the gutters, preventing water from seeping underneath the roofing material, which can lead to leaks and extensive damage.
- Increased Longevity: By keeping water away from critical joints and seams, drip edges can substantially extend the lifespan of your metal roofing system, saving you money on repairs and replacements in the long run.
- Improved Aesthetics: Drip edges provide a clean and finished look to your roof. They hide unsightly edges and create a seamless transition between the roof and the gutters, enhancing the overall appearance of your home.
- Wind Resistance: A properly installed drip edge helps in securing the roofing material against strong winds. It reduces the risk of metal panels lifting or becoming dislodged, which is critical for homes in storm-prone areas.
- Facilitates Ice and Snow Management: In colder climates, drip edges help control the formation of ice dams by promoting drainage, thus avoiding the accumulation of snow and ice near the eaves.
- Cost-Effective Solution: The installation of drip edges is relatively low-cost compared to the potential damage they prevent. Investing in drip edges can lead to significant savings over time by avoiding costly repairs associated with water damage.
By understanding and implementing these benefits, homeowners can effectively transform their roofing systems while ensuring enhanced protection and aesthetic value. Make sure to consult experts or conduct thorough research to ensure proper installation techniques are followed.
Common Mistakes to Avoid When Transforming Your Roof with Drip Edge
Transforming your roofing with drip edge can significantly enhance the functionality and durability of your metal roof. However, there are several common mistakes that homeowners often make during this process. Here are key pitfalls to watch out for:
By being aware of these common mistakes, you can ensure a smoother installation process and achieve a successful transformation that will effectively protect your roof.
Expert Tips to Maintain Your Metal Roofing Post Drip Edge Installation
After you successfully install drip edge on your metal roofing, maintaining the roof becomes essential to ensure its longevity and performance. Here are some expert tips to help you keep your roof in top shape:
Maintaining your metal roofing after installing drip edge is critical in ensuring that you transform your home into a safe and efficient living space. Following these tips will help you maximize the benefits of your roofing investment.
Frequently Asked Questions
What is drip edge and why is it important for metal roofing?
Drip edge is a metal strip installed along the edges of a roof that directs water away from the roof and into the gutters. It is essential for preventing water damage to the roof and the underlying structure.
How does drip edge enhance the longevity of metal roofing?
By effectively managing water runoff and preventing moisture buildup at the roof’s edges, drip edge helps reduce the risk of rust and corrosion, thereby extending the lifespan of the metal roofing.
Can I install drip edge by myself, or should I hire a professional?
While DIY installation is possible for those with basic roofing skills, hiring a professional is recommended to ensure proper placement and secure installation, which can prevent future issues.
What materials are commonly used for drip edge?
Drip edges are usually made from aluminum, galvanized steel, or copper. Each material offers different benefits, such as resistance to rust or enhanced aesthetic appeal.
How should drip edge be installed on a metal roof?
Drip edge should be installed after the roofing panels but before the gutters. It should extend over the fascia and be nailed down securely, making sure the edges are properly overlapped.
What are the common mistakes to avoid when installing drip edge?
Common mistakes include improper alignment, not overlapping joints adequately, or failing to extend the drip edge beyond the roof edge, which can lead to water pooling.
How can drip edge improve the overall aesthetics of a metal roof?
Drip edge provides a clean and finished look to the roof edges, enhancing the home’s curb appeal and potentially increasing property value.
